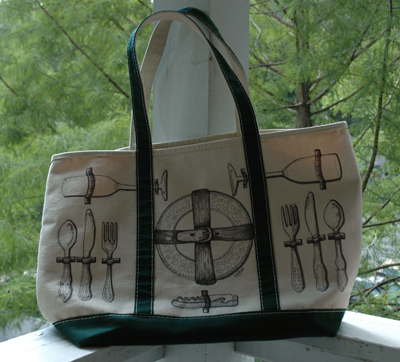
I'm huge fan of all the beautiful and unique picnic bags popping up lately, butcouldn't bring myself to buy another bag when I already own too many (I'm really working on the "less is more" philosophy.) Instead, I decided to take an old canvas tote I already owned and make it over. So here is how it turned out!
via personal collection
Step 1: Get a plain tote. This one (from LL Bean) used to be my grandmother's, but she handed it over to me awhile back because she never used it. Instead of taking off her initials (which I kind of like) I simply turned the bag around to the blank side. If you wanted though, you could pull out the seam ripper and go to town removing the monogram. I just didn't think it was necessary.
via personal collection
Step 2: Sketch out what you would like on the bag in pencil. I went with the whole "looking into an open picnic basket," but you could draw out wine bottles, loaves of bread, herbs...whatever you'd like. I'm a big proponent of drawing from life though, so I pulled out the mismatched flatware, the wine opener etc. to make sure everything would look close to how it should. (For me, this was most important for the buckle around the plates. I drew a blank when trying to remember what it should look like and had to bring out a belt!)
via personal collection
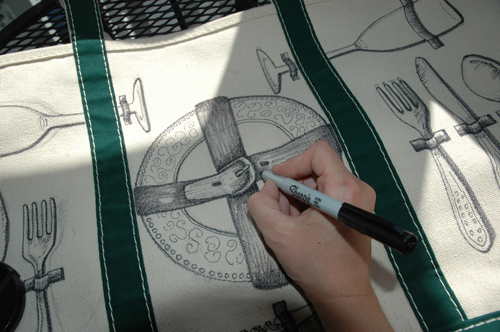
Step 3: Trace over your sketch with a Sharpie. You could probably use a fabric pen, but I didn't have one handy. (As an artist though, I always have sharpies around!) I decided to use two sizes- thick and thin- to create more depth in the objects. Pick where you'd like the light source to come from (thanks to studying scientific illustration, I almost always have it coming from the top left) and use the thick Sharpie on all of the areas that should have a shadow. For me, that meant I used it on the right side of my objects. Once that's done, use the thin Sharpie to finish the other parts and to add delicate details to the flatware, plates etc. I kept going and added more values to the straps etc, but that's not necessary. I just thought it made everything pop a little more!
Step 4: If you feel like it, erase your pencil marks. I didn't care if you could see the sketch so I didn't worry about it, but if it bothers you, feel free!
via personal collection
Step 5: Step back, marvel in your handiwork, and get to planning a picnic so you can show off your new bag! Hope you all enjoy!!


